This one has been quite a long time coming, been kind of hoarding pics ever since August 18 until I thought I had enough progress for a proper post.
Rather than go ahead and shingle the back side, I elected to start on the front side of the house and get it's roofline fixed and sheeted first.
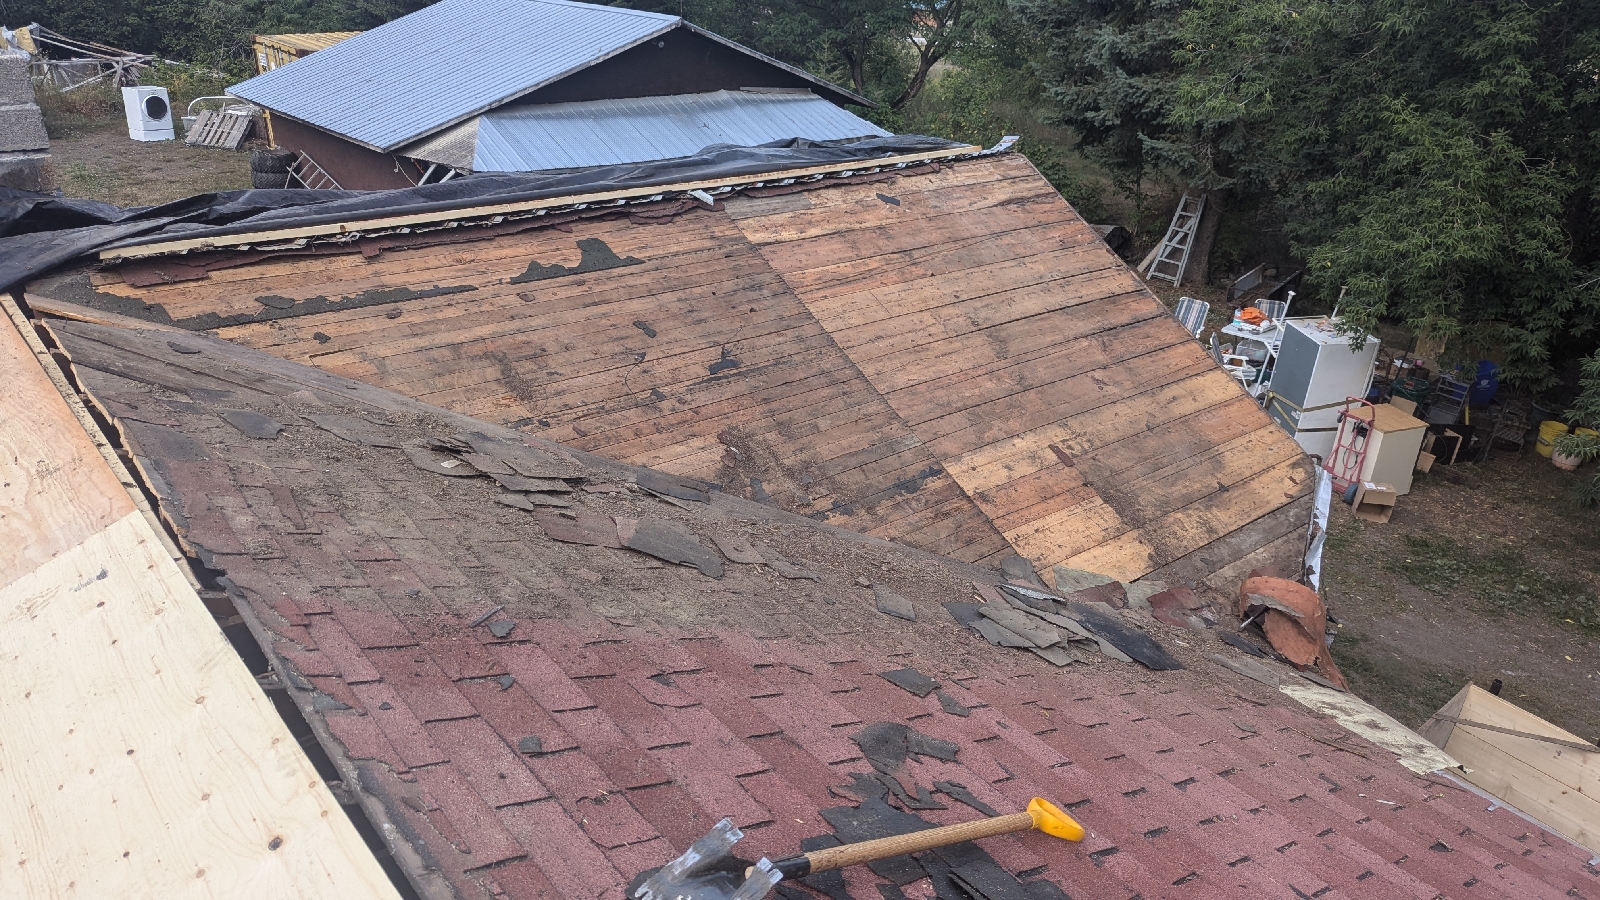
I parked the newly boxed truck under the roofline and got ready for some deja vu to back when I was bright eyed and optimistic about how long this was going to take. Shingle removing tools in hand (if you are going to do ANY roofing that isn't tin, please invest in one of the shingle tools. It takes the job from unbearable to almost easy) I got to work getting those shakes off.
The amount of dirt and mud wasp nests (thankfully all vacant) under those shakes was absolutely breathtaking. Next up, the asphalt shingles.
With the mass amount of flashing and various other efforts to keep moisture out gone, you can see the absolutely abysmal roofline they had going, which actually hung down in front of one of the kitchen windows. Not ideal. That will be corrected when it comes time to fix the roofline.
Unlike with the last pickup, all of those shakes and shingles (except for a section that doesn't presently have a tarp for it) fit easily in the truck with room to spare.
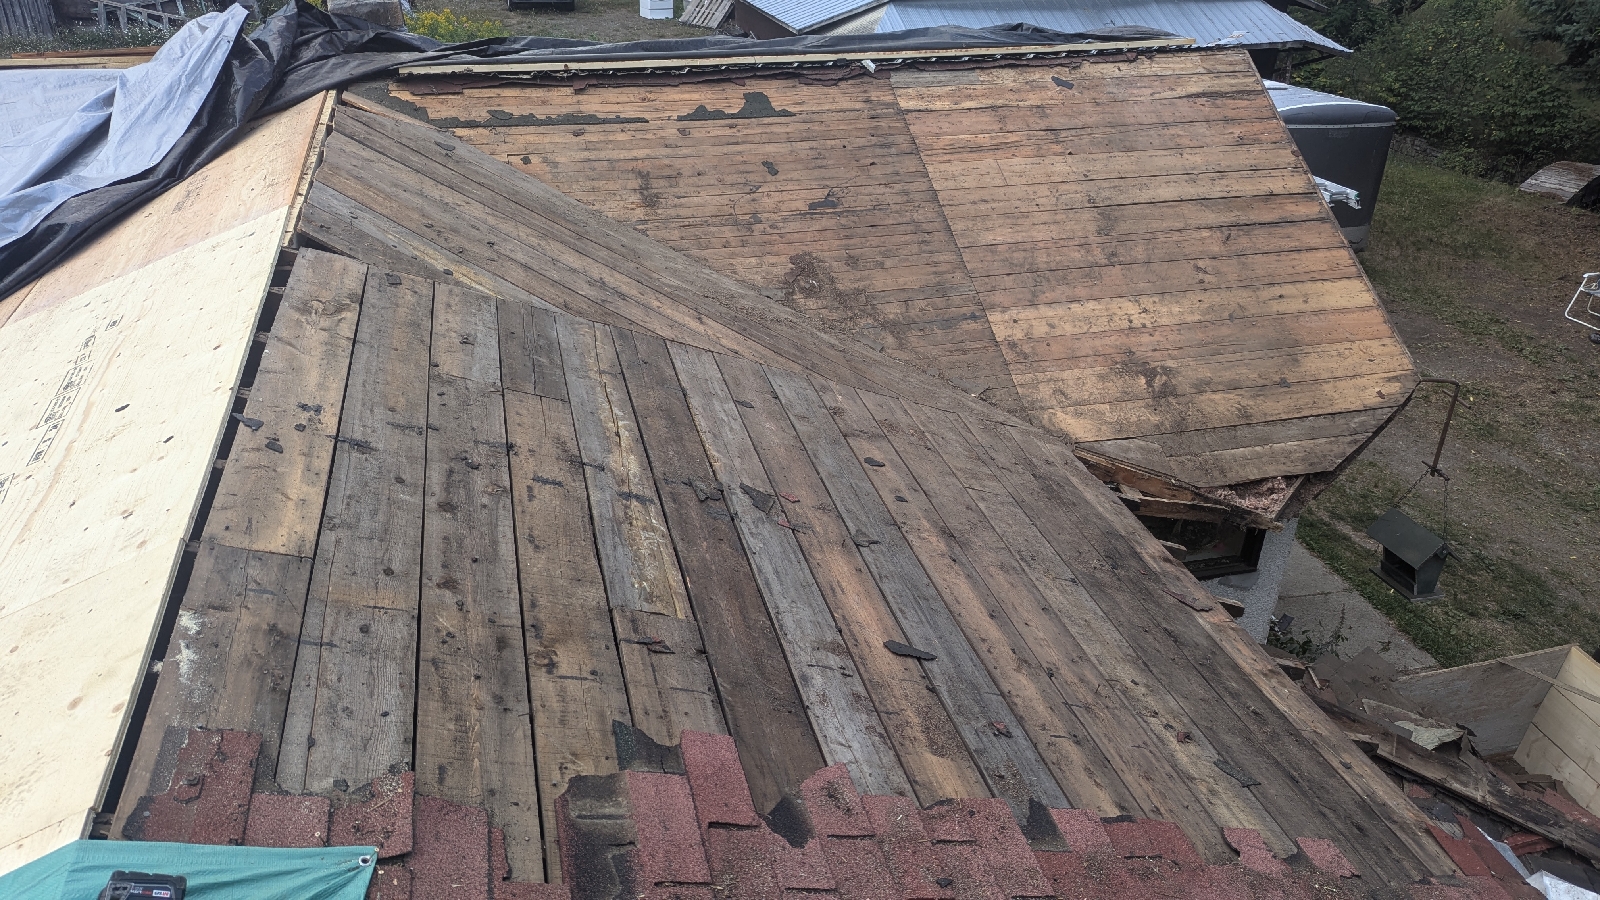
Actual roofing materials gone, it's time to start stripping the old sheathing. A good friend gave me a hand getting that all torn out.
You can see on this part of the roof they actually extended the sheathing boards back from the very edge and as a result the overhang ISN'T sagging here. Too bad it's both poorly supported and trapezoidal so I still need to redo it.
We managed to put up one sheet of plywood before quitting time for the day. We tarped it back up and there it sat while I focused on getting heat in the house, digging the trench to the propane tank's location and whatnot. All this progress happened between Aug 18 and Aug 21, and hasn't been touched again until today, Sep 7.
First things first was removing the bizzare roof extension I mentioned earlier, making everything squared up again, and once again twinning the long 2x6 rafter on the addition, same as the other side. This wasn't strictly necessary because thankfully there was no water damage on this side of the roof, but it gives me a nice strong new point to start building the new valley in, and matches up with the other side.
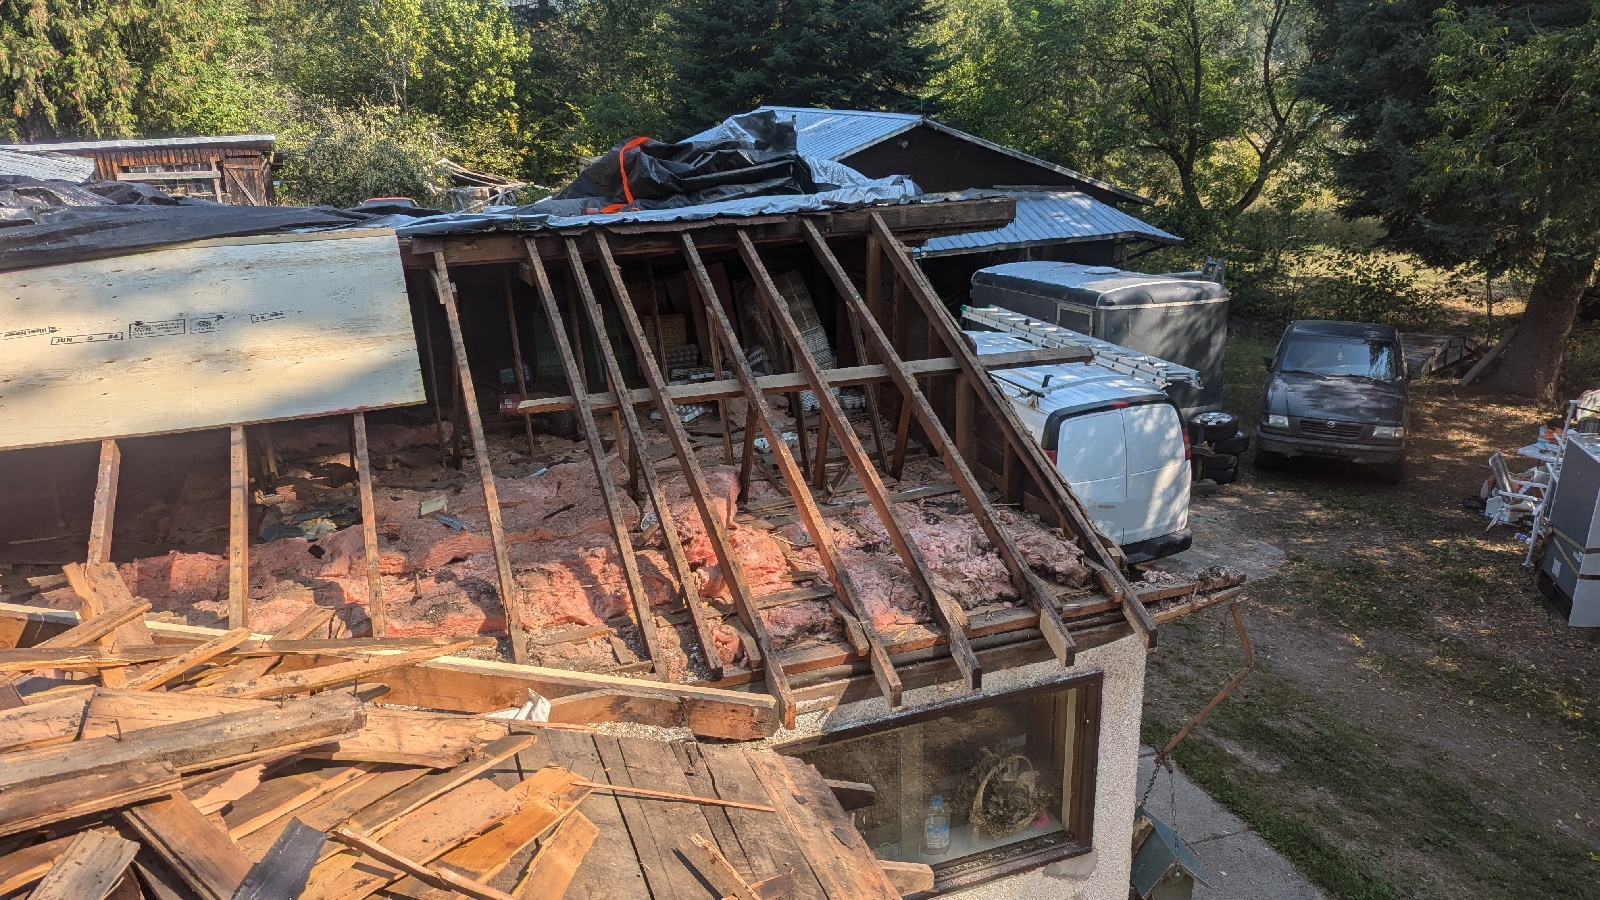
Next up, I was fixing to continue the sheathing so I can get to valley framing but that led me on quite the "but before you can do that, you must..." rabbit trail. As I mentioned before, I'm trying to build this as strong as possible so that it will never need to be redone. That means full sheets of plywood on all the edges and corners whenever possible. A quick glance tells me that with the first piece of plywood up, the next one I'm going to have to be the bottom corner of the original house roof. That means it's time to get rid of the rest of that old sheathing.
Oh, and also the old overhang.
And now, before I can slap that new plywood down, I have to redo my rooflines so I know WHERE to put the plywood. Initially I started by extending the rafters on the old house down so that I had a nice 14" from the stucco. But I soon realized that would give me 2 different levels of roof ending which would both look very strange, and not pan out well for gutters. Back to the drawing board where I realized I had to get the addition roof to 14" and then just match that level with the original roof. That involved demoing the edge of the addition until I had a clear shot to nail my facia board, and lining everything up with the original house's facia board. I'm embarrassed to admit how many hours this whole process took, but it was well into the afternoon before my roof looked like this.
It actually panned out that I was able to simply fasten the facia boards right to the existing rafters as they were cut and they ended up at the same, correct level. This left me with just over 13" so I'll be putting some 3/4 ply over top the facia board to make it nice and uniform. Speaking of, due to the design of the existing framing and how it all panned out, in order to keep a consistent facia height, the overhang above the kitchen window works out to about 9 inches. This section is the only part of the house that will not have a consistent 14" width off the stucco, just as a quirk of the previous framing.
It was necessary to make these two line up nicely.
You can ignore the 2x6 screwed to the house, that was part of the backing that I was going to use when I was going to extend this portion to 14", and I'll be removing it.
You may have also noticed the end board in that second to last pic. With the way the previous framing was done, all I had to do was again slap a 2x6 on the ridge, cut the 2 braces to length and slice a nice rafter ish board to fasten on as such.
That board in place, I made a twin for it and cut out a couple notches for the braces that were formerly under the 2x4 they had extended out originally. This piece will be backing for the eventual soffit.
Nearing the end of the day, I was finally able to do what I had hoped would be one of the first things of the day, slap that sheet of plywood in the corner.
It needed a small notch cut out to clear the addition's rafters, and with that out of the way I was able to notch and put the last sheet needed to rebuild the valley in. That'll be tomorrow's task, spending the entire day cutting, what, 7 pieces of wood to rebuild the valley. Insane. Perhaps if I was a more talented carpenter. Hopefully I'll have some real progress to show tomorrow night!
All this work was done with previously purchased material so the total reno cost hasn't gone up at all.
Stay frosty friends.


Comments
Post a Comment