Fresh off a little break to catch my breath, it was time to get back into the main project at hand, making sure my house doesn't fall over.


 Once I had removed all of the rotten framing, top plates included, I gave the whole area another thorough bleaching and scrubbing with a stiff bristle brush to dislodge anything loose. Once it dried fully and completely, I gave the outer sheathing a nice heavy coat of the wood treatment to ensure no rot would continue or spread, and then I rebuilt the exterior wall top plate.
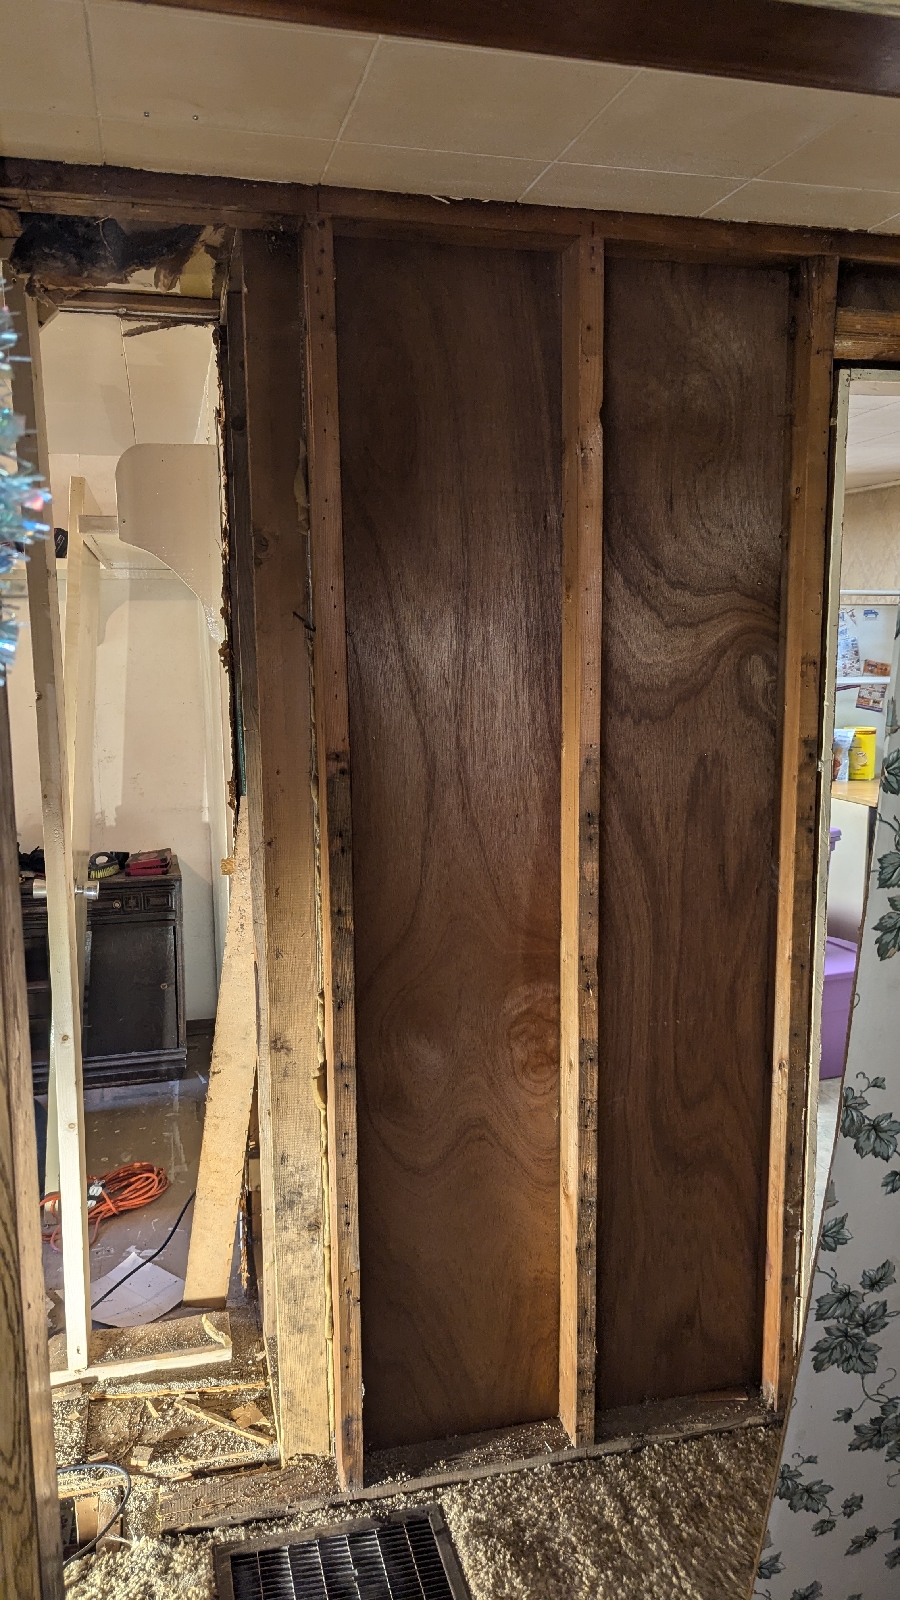
 The rebuilt top plate ended up being 3 to 4 2x4s thick, with a strong probability that I'll make the rightmost section 5 thick once I get onto the roof again. It worked out this way because when the addition to the left was made, not everything lined up perfectly with the original framing on the right. Turned out that the top of the double plate on the left was approximately level with the bottom of the double plate on the right. Naturally I kind of puzzle pieced that in, which meant I had to do another below it to fill where the bottom of the double plate would be on the left side addition's framing. But that left an exposed joint which I didn't feel super comfortable with so I cut one more piece to fill right in between the two and nailed it in. That makes this piece of work I zoomed in on here.
 Something to note: if you have a keen eye, you'll see that all of this top plate framing is much darker wood than the other new wood around it. This isn't because I reused the old wood, but rather that all of this is pressure treated lumber. It's up against the old sheathing that had rotted in the past and I am taking absolutely no chances that will spread again.
 I removed one final stud and cut back the bottom board of the top plate (so that I could properly stagger the joints) and the bottom plate/subfloor to expose the floor joists, as I have along the rest of the wall (these needed to be torn up because there was no consistent bottom plate, with the closet and door opening). That middle stud is aligned almost perfectly with the floor joist below it, so for this temporary time between now and when I redo the remainder of this wall, I nailed a couple of supporting blocks for the end of my bottom plate.
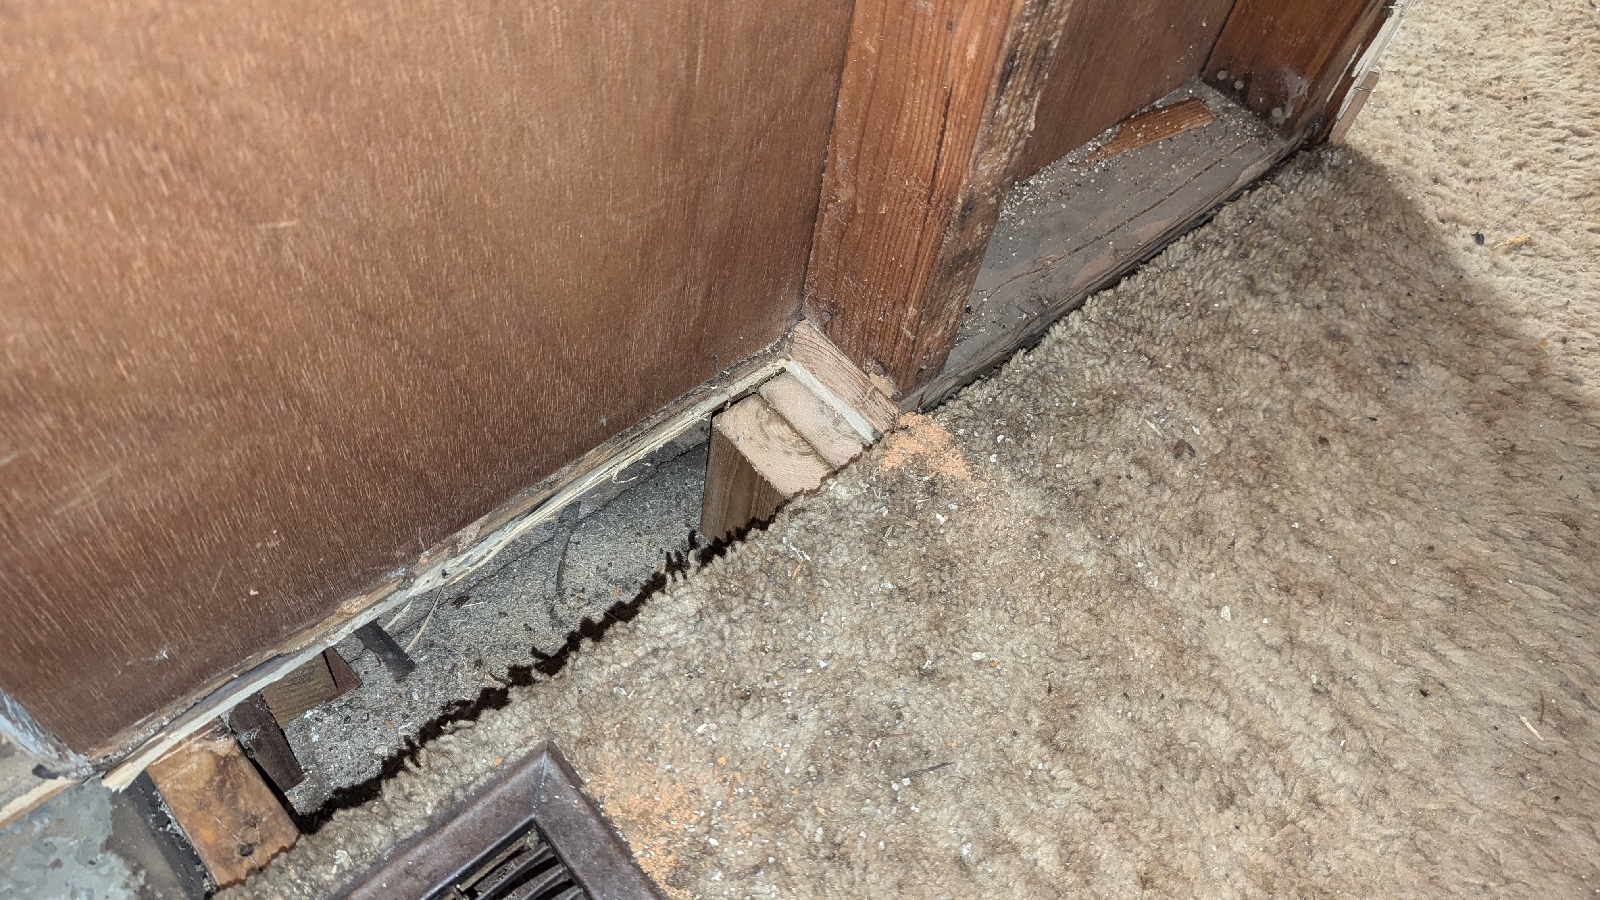 I also added one additional supporting block to the other end, even though it already has the support of the end floor joist. Yes I'm over building, you'll see the extent of that later.
 Alright, so I have 3 life mottos, the second of which is "there's no such thing as overkill"
 It obviously cracked, badly, when the addition settled and was repaired, badly, as a result. Now, you saw how all those boards lined up. I didn't like it. At all. I wanted backing to back up that joint for if or when it ever gets addressed from the outside. I want somewhere to screw or nail the outside boards to. Minimum requirements here, and what was there before, was 2x4 as a stud. That would simply not do. 2x12 to the rescue.
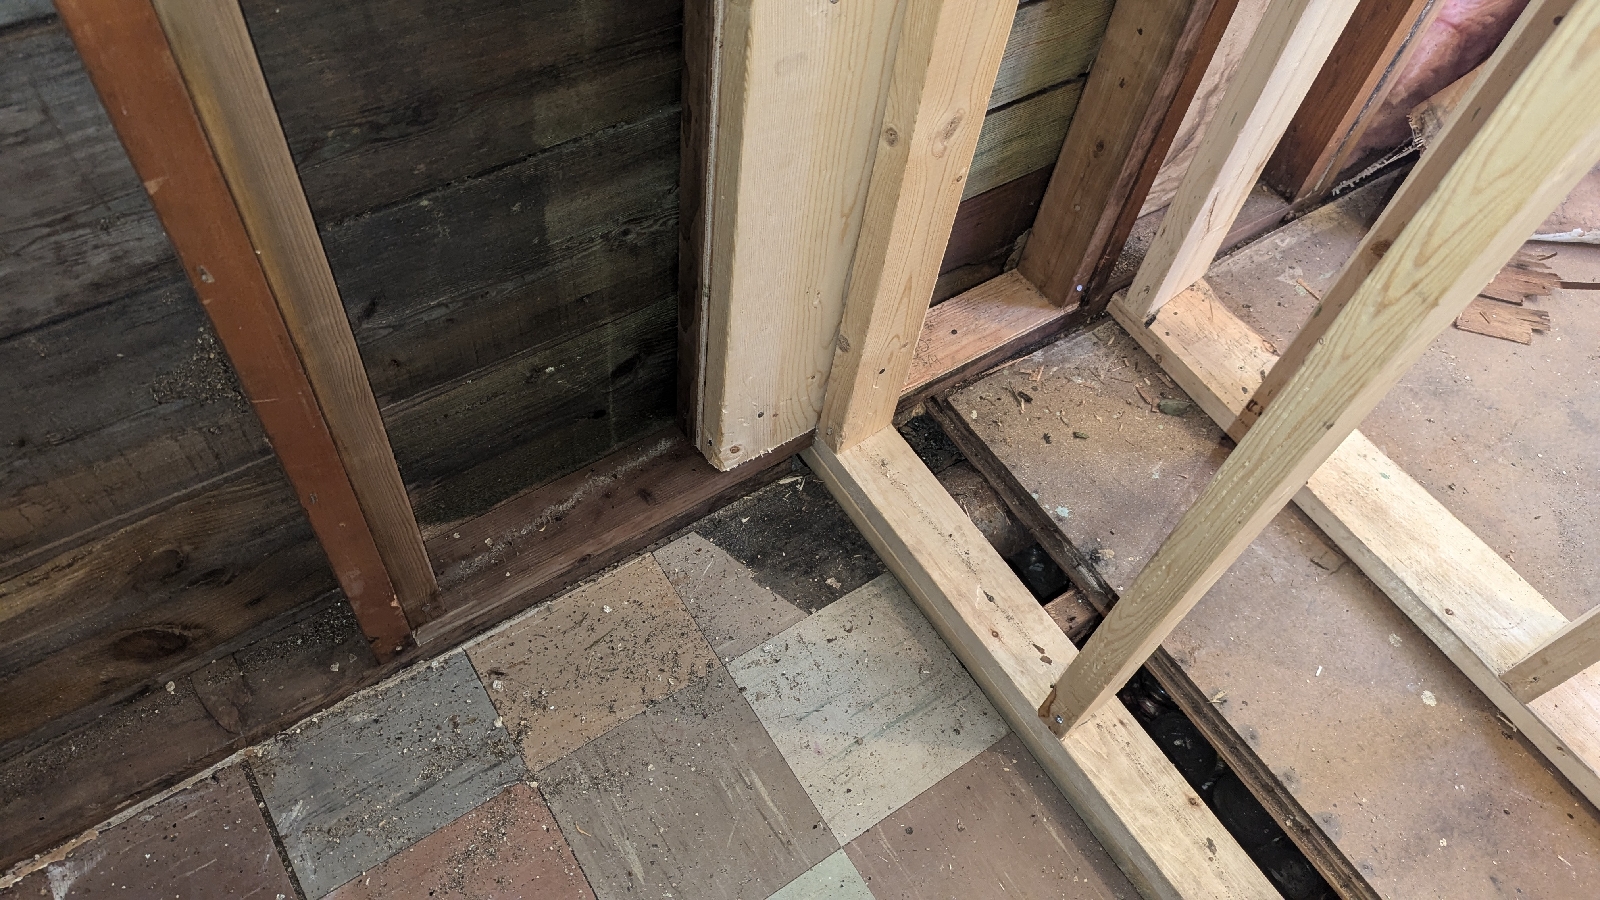
 Again, I fall victim to an old house and an addition being not perfectly straight with the original build. You can see the new double bottom plate rising above the original exterior walls. On the original house (right) side, it was a perfect half inch, solved easily with a bit of plywood. On the addition, it was a bit more than that, so I nailed on an additional bottom plate. This created a step of approximately 1/4", which I just accounted for by cutting a small jag in the bottom of the 2x12. To fill the wall, I ended up using a pressure treated 2x12 on the flat, followed by a piece of 1/2" plywood to fill the gap, and another 2x12, this time not pressure treated as it's not in contact with the outer sheathing. This combo, the same commonly used in headers above doors and windows, is the same thickness as the outside walls, making this over build serve 3 purposes: being a very solid post for this important corner in the house, covering both sides of the horrendous gap where the addition was made for giving plenty of meat to re secure those boards when the time comes, and, creating backing for when drywall eventually comes on the inside.
 In the above pic you can see the double top plate, and the end stud supporting the bottom 2x4 in the double top plate, along with the extra pressure treated studs I nailed in place to support either side of the exterior wall top plate reconstructive surgery. Overkill? Again, yes, probably. I want to do this ONCE. All I lose here is a tiny bit of space to put insulation so I may lose a tiny bit more heat through this corner and that truly won't be the end of the world.
 Something to note about the above image is I've screwed the final two studs in, because they are only temporary until I do the other half of the wall. You can see the double bottom plate ends in the same spot out of necessity. When the time comes to re frame the rest of the wall, I'll remove those last two studs, cut the top most bottom plate piece, and lay the new top piece over to create a staggered joint, before putting those studs back in with nails.
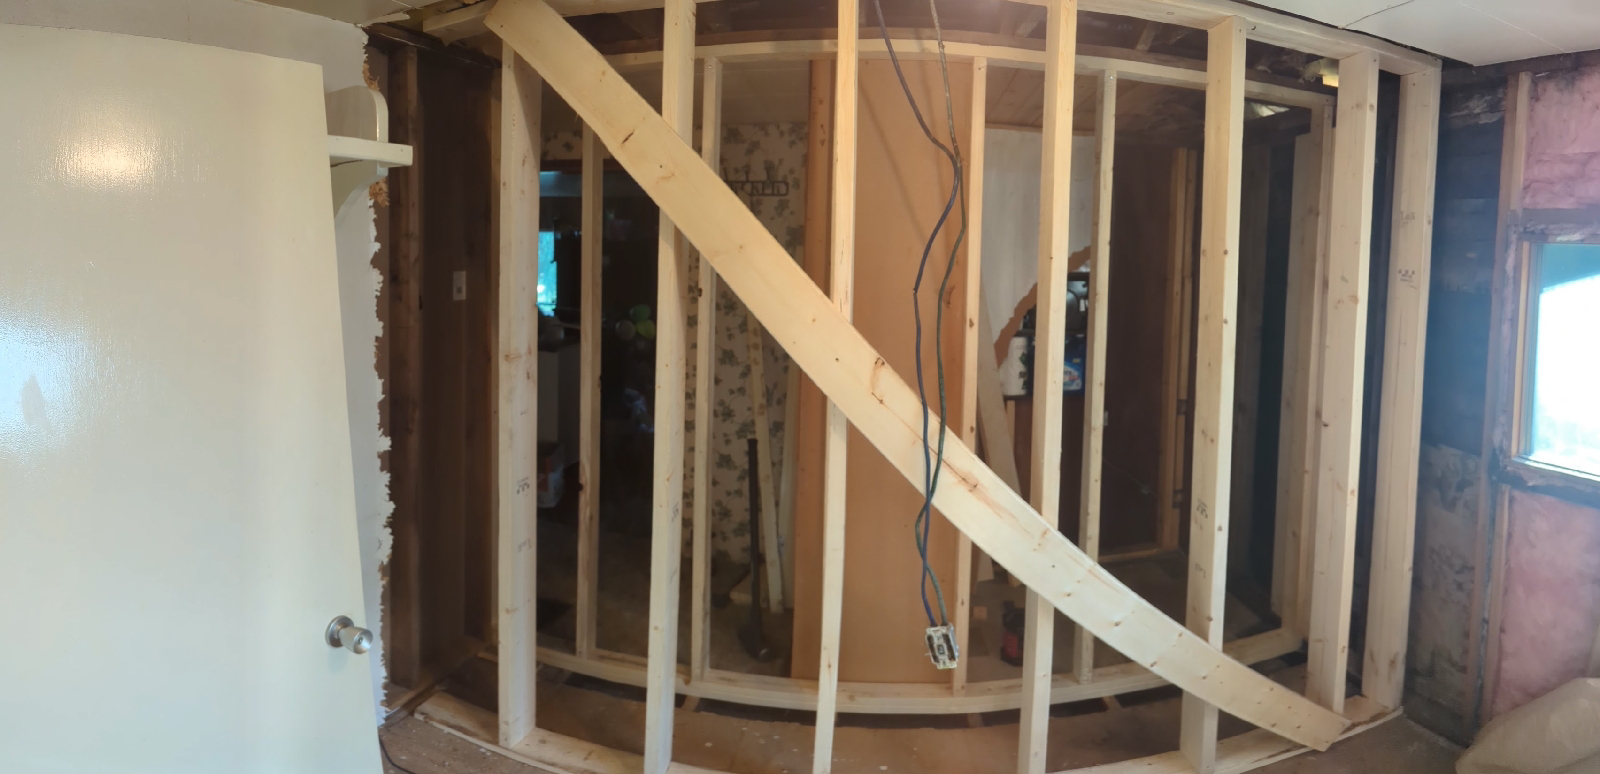
 There it is in all its glory; a formerly rotten and inadequately framed series of walls overbuilt and ready to stand up to the sands of time. Here are a couple of close ups of the top and bottom.

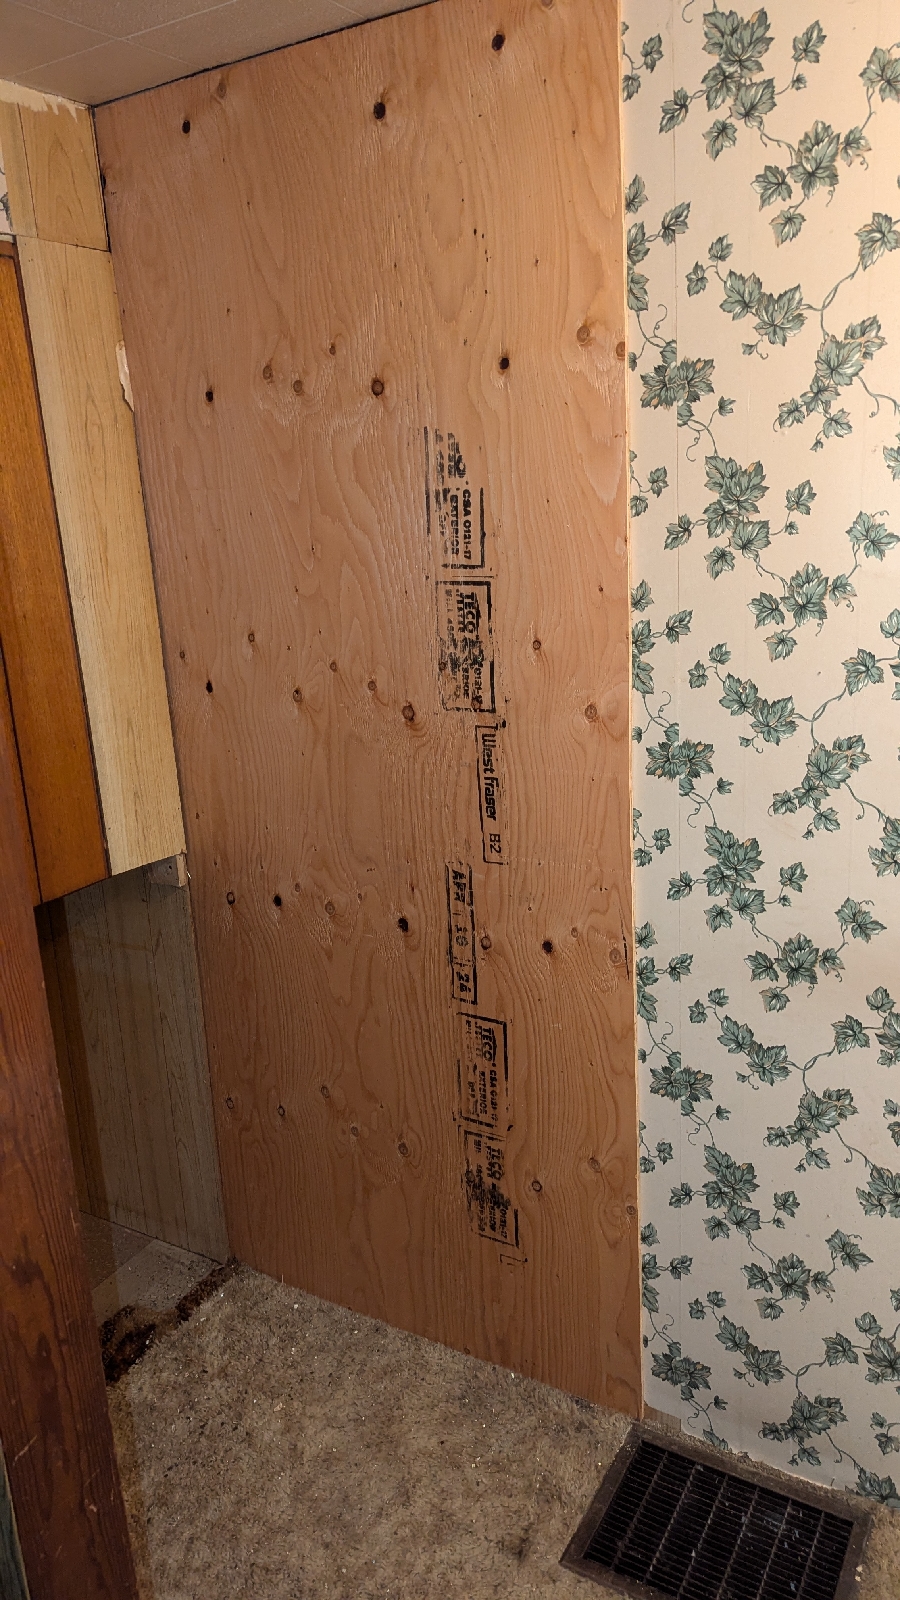
 With the new permanent wall in and supporting the roof, I was able to remove most of the scab wall, leaving the final 3 scab studs to support the rotten rafters until I can get on the roof and replace those. I also trimmed a piece of plywood to cover the former door opening to close this area off until I can get the roof finished up. We do still live here and it's nice to not have to stare at open construction all the time.

 Im going to pinch this post off with a few repeated pictures, 4 total of side by side before/afters.

 From "oh fuck, what have I gotten myself into" to "now that ain't going anywhere"

 And from "Load bear'er?! I barely know er!" To "that's a damn fine overbuilt wall right there"
When I last left, I had gotten the final rotten stud out, and done one coat of bleach on the outside sheathing to kill any rot. That out of the way, I put a single scab stud under the one rafter that wasn't supported on the other load bearing wall, fired up the angle grinder and flushed up all those nails.
I also got out my sawzall and removed the rotten top plate parts of all 3 walls.
The rebuilt top plate ended up being 3 to 4 2x4s thick, with a strong probability that I'll make the rightmost section 5 thick once I get onto the roof again. It worked out this way because when the addition to the left was made, not everything lined up perfectly with the original framing on the right. Turned out that the top of the double plate on the left was approximately level with the bottom of the double plate on the right. Naturally I kind of puzzle pieced that in, which meant I had to do another below it to fill where the bottom of the double plate would be on the left side addition's framing. But that left an exposed joint which I didn't feel super comfortable with so I cut one more piece to fill right in between the two and nailed it in. That makes this piece of work I zoomed in on here.
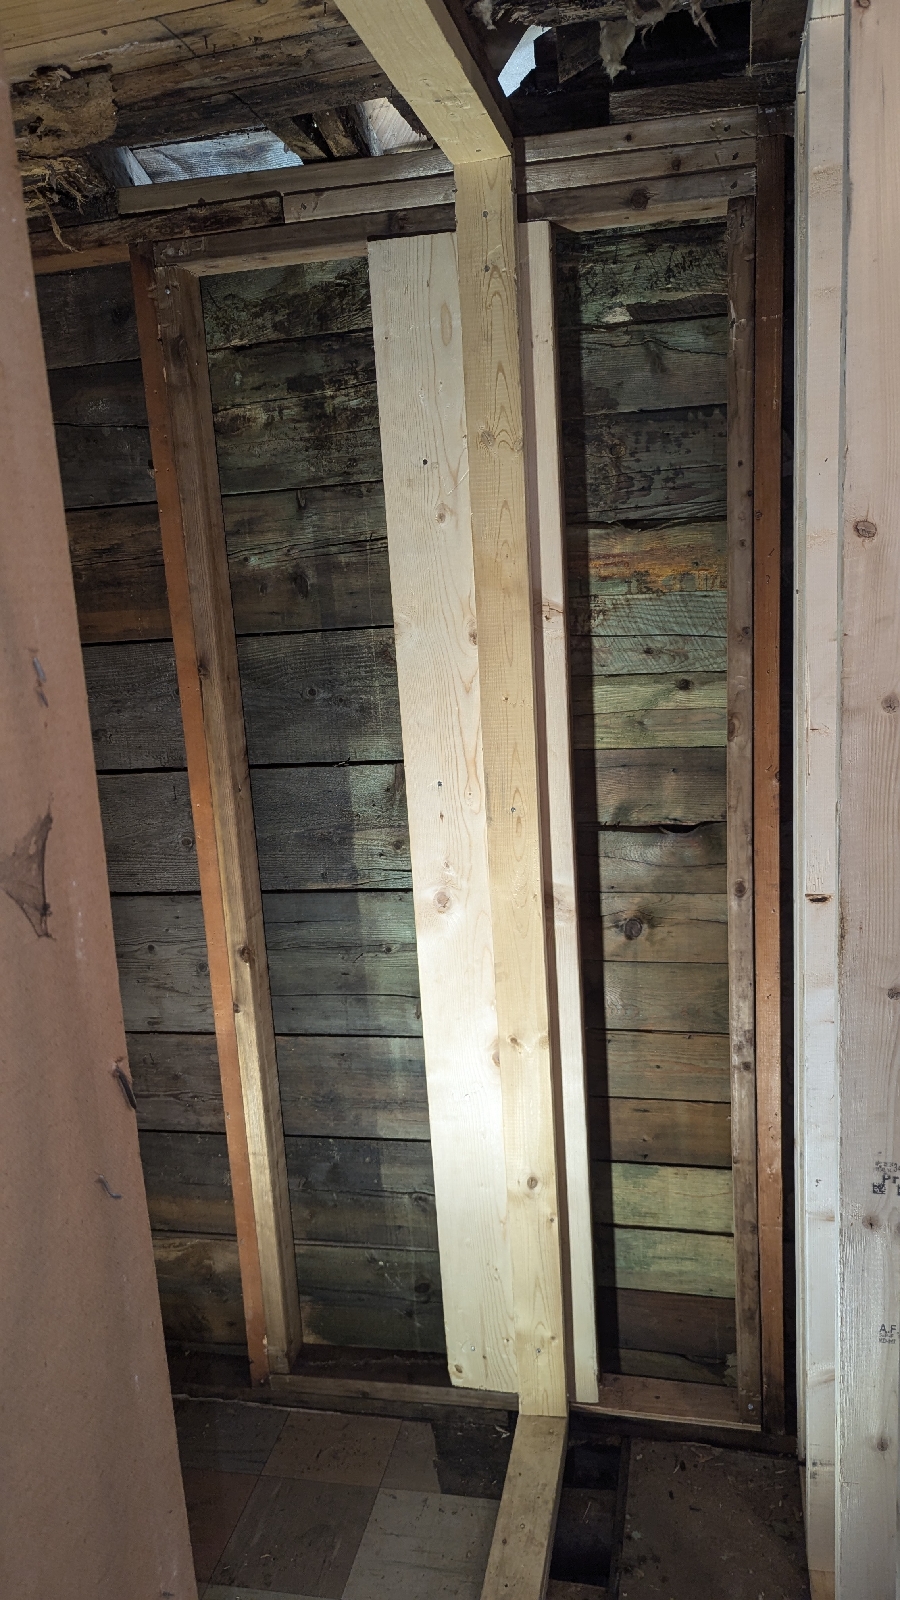
With that taken care of, I left the room and started into the hallway. The whole point of this exercise is to redo this very important structural load bearing wall, and I'm doing it correctly or better, which means extending my work past where it needs to go. I peeled off the paneling and was met with the only framing so far that didn't have me worried.
You are going to see that a lot going forward, this is my home, and where I hope is my forever home, I'll put a little extra wood here and there to make things sturdy; I do not, ever, want to have to deal with these problems again. The minimum requirements for load bearing walls are single bottom plate, double top plate. For this wall, I'm running double top and bottom plates. It's an old house, the floor joists aren't perfectly 16" on center so they don't quite line up with the studs, I want things skookum. Speaking of overkill and skookum, remember that awful gap where the joint between the old house and the new meet? This is what it looks like on the outside.
So that's the main repair done then, all that was left was to measure my remaining 8 studs and nail them in place. While doing this I found that between the exterior wall, now properly rebuilt and that small section of proper framing that I showed earlier, the wall was sagging over 1/2 inch from being improperly supported. With all the same length studs and a little help getting them in place from Mr. Sledgehammer, I was able to correct that and straighten the whole thing out.
And there it is, start to finish, how to take a disaster of a rotten, improperly framed load bearing wall, and make it so that you will never need to worry about it again. Thank you once again to my dad, who taught me everything I know about framing, and my excellent friends who come through in a clutch with both knowledge and and tools that I lack. It's once again far past my bedtime, so that's all for now.
Comments
Post a Comment